 1")
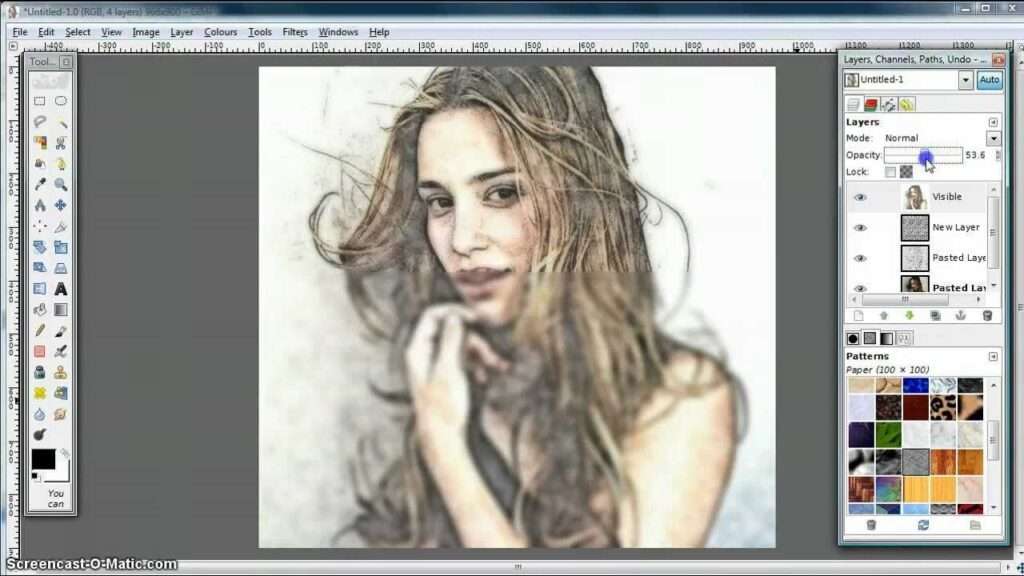
photoshop
Have you at any point wanted to hand-draw a representation of your #1 individual or pet to show on the wall gladly? Indeed, drawing is difficult work and you want a lot of ability, persistence, and practice to arrive at that point.

Or then again isn’t that right?
Greetings, I’m Cara! I love making computerized workmanship in Photoshop and I love that Photoshop allows me to get things done with my pictures that I would never do with a pencil or brush.
Is it safe to say that you are following me? Indeed? Then we should make a plunge and I’ll show you how you can transform a photograph into a reasonable attracting Photoshop!
Stage 1: Set up the Picture
Open your picture in Photoshop and copy the foundation layer with Ctrl + J or Order + J. This gives us something to return to on the off chance that we mess up.
Here is the charming however somewhat frenzied looking rabbit we’ll work with today. I got this picture from pexels.com.
Then, right-click on the layer to open this menu. Pick Convert to Shrewd Article.
There are a few advantages of utilizing savvy objects. For this situation, we’ll apply channels and the brilliant item permits us to return and change those channels toward the end.
Stage 2: Modify the Picture
This one looks bizarre, yet go with it, I guarantee it will end up actually working. Hit Ctrl + I or Order + I to alter the picture.
Stage 3: Add Gaussian Haze

Presently go to Channel in the menu bar, float over Obscure, and pick Gaussian Haze.
We need a lot of obscure so we should begin with 50 pixels. Due to the brilliant article, we can return and change this worth toward the finish to perceive what it means for the appearance of the last picture so it doesn’t make any difference an excess of what you pick as of now. Click alright.
Stage 4: Change the Mix Mode
Change the mix method of the picture layer to Variety Avoid.
Presently you ought to see the starting points of the sketch look.
Stage 5: Add a Levels Change Layer
The sketch looks a little pale, so we should add some difference. Click the Change Layer symbol at the lower part of the Layers board. It seems to be a half-filled circle. Pick Levels.
Raise the dim and mid-tone values to see a few definition and difference in your picture.
Stage 6: Add a Highly contrasting Change Layer
To go for the graphite pencil look, we should add a highly contrasting change layer. Go to the Change Layer once more, however this time pick High contrast. To go for a shaded pencil sketch, you can skirt this step.
Stage 7: Make a Depiction
We want to unite everything so we can apply another channel to the aggregate picture. Hit Ctrl + An or Order + A to choose all. Or on the other hand go to Choose in the menu bar and pick All.
then, at that point, go to Alter and pick Duplicate Blended or hit Shift + Ctrl + C or Shift + Order + C. At last, place the depiction by choosing Glue or hitting Ctrl + V or Order + V.
You ought to see the consolidated layer show up at the highest point of the layer stack.
Stage 8: Add a Sparkling Edges Channel
Go to Channel and open the Channel Display.
Open the Adapt envelope and pick the Gleaming Edges channel. On the right, pick the base Edge Width and the maximums for both Edge Splendor and Perfection. Click alright.
Hold up! Things are looking somewhat out of control once more!
Hit Ctrl + I or Order + I to rearrange the picture once more. Likewise, change the mixing mode to Duplicate.
Stage 9: Add a Paper Surface Impact
To make the drawing look more legitimate, we should add a paper surface to the picture. The least demanding method for helping out variety fill layer.
Click the Change Layer symbol at the lower part of the Layers Board and pick Strong Variety.
You can pick anything variety you need from the variety picker that opens, yet how about we go with white. It’ll cover over your picture, however relax.
With the variety fill layer featured, go to Channel, and pick Channel Display. This cautioning will spring up. Pick Convert to Brilliant Article to have the option to change the variety later. Assuming that you intend to keep it white, you can just hit Rasterize.

Change to the Surface envelope and pick the Texturizer channel. In the Surface box on the right, you have four choices. Both material and sandstone give your picture a paper-like surface. You can play with them and the scaling and alleviation choices to find the look that you like.
To bring the picture through, change the mix mode to Increase and diminish the mistiness of the variety fill layer to around 70%.
You’ll need to get very close on your screen to see it, yet notice how there is currently a slight surface to the picture?
Stage 10: Play with the Outcomes
You can either leave your sketch for all intents and purposes or you can change things a piece to see what you like better. Stir things up around town symbol close to the highly contrasting change layer to switch off the perceivability. This will bring variety back into your picture and you can conclude which rendition you like.
You can likewise take a stab at tweaking the Gaussian haze esteem. Look down to Layer 1 and Double tap on the Gaussian haze channel. (Here’s where utilizing a shrewd item proves to be useful).
This is what it resembles at 50 pixels.
Contrasted with 90 pixels.
Have some good times playing with it to see what you like and what functions admirably for your picture!